A beautifully layered cake is a sight to behold and a treat to savor. But when it comes time to cut into it, the fear of ruining the presentation can be daunting. Fear not! With a few simple steps and techniques, you can confidently slice and serve a layered cake like a pro. In this blog, we will guide you through the process of how to cut a layered cake with precision, ensuring each slice maintains the integrity of the layers and brings joy to all who indulge.
Step 1: Gather the Essential Tools
Before you embark on cutting your layered cake, make sure you have the following tools ready:
- A long, sharp knife: A serrated knife or a long, thin-bladed knife will work best for clean and even cuts.
- Offset spatula (optional): An offset spatula can be handy for lifting and transferring cake slices without disturbing the layers.
Step 2: Choose the Right Moment
Timing is crucial when it comes to cutting a layered cake. Make sure the cake has been properly chilled or refrigerated to allow the layers to set and firm up. This will help prevent the cake from crumbling or losing its structure during the cutting process. Aim to cut the cake when it’s cool but not overly cold.
Step 3: Plan Your Cuts
Decide on the desired thickness of each slice. Keep in mind that thinner slices will yield more servings, while thicker slices provide a more indulgent experience. To ensure consistency, mark the cake’s outer surface with toothpicks or small incisions, indicating where each slice will be cut. This will serve as a guide during the cutting process.
Step 4: Wipe the Knife Clean
Before making the first cut, wipe the knife blade clean with a damp cloth or paper towel. This step ensures a neat and precise cut, as any residual frosting or cake crumbs on the knife can mar the appearance of the layers.
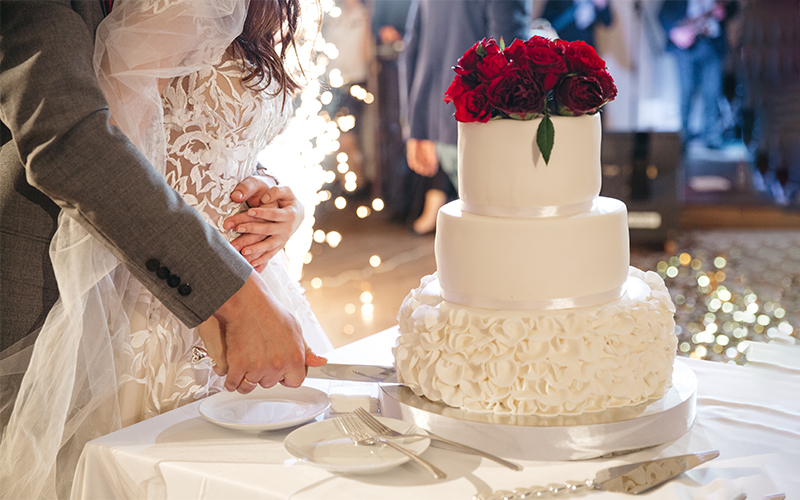
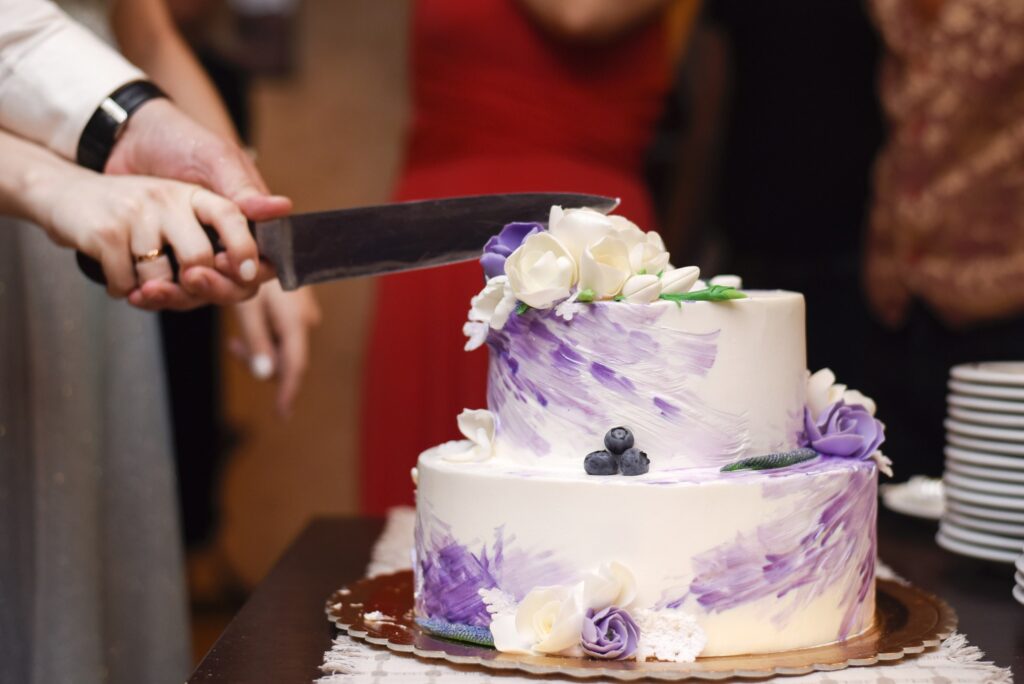
Step 5: Start with a Steady Hand
Hold the knife parallel to the surface of the cake and gently press the blade down into the cake at the designated marking. Apply steady downward pressure, using a gentle sawing motion to cut through the layers. Avoid applying excessive force, as this can cause the layers to shift or squish.
Step 6: Lift and Serve
Once the slice is cut, carefully slide an offset spatula or a cake server underneath the slice, ensuring you get underneath all the layers. Lift the slice gently, supporting it from below, and transfer it to a serving plate or individual dessert plate. Repeat this process for each slice, making sure to wipe the knife clean before every cut.
Step 7: Presentation Matters
To maintain the cake’s visual appeal, consider presenting the first few slices at their original width. As you move toward the center of the cake, you may adjust the width of the slices slightly to ensure a more balanced presentation. Just be sure to maintain the integrity of the layers and avoid compressing or distorting them.
Step 8: Enjoy and Share!
Now that you’ve successfully cut your layered cake, it’s time to share the deliciousness with friends, family, or guests. Serve each slice with pride, highlighting the beautifully stacked layers and the artistry of your creation.
Conclusion
Cutting a layered cake doesn’t have to be a nerve-wracking experience. By following these step-by-step instructions, armed with the right tools and techniques, you can confidently slice and serve a layered cake with precision and finesse. Remember to plan your cuts, keep the knife clean, and handle each slice with care. With a bit of practice, you’ll master the art of cutting a layered cake, ensuring that every serving is a delight to the eyes and a delight to the taste buds.
Remember, practice makes perfect. Don’t be discouraged if your first attempts aren’t flawless. Each cake is unique, and mastering the art of cutting layered cakes takes time and patience. With each cake you cut, you’ll gain more confidence and improve your technique.
Here are a few additional tips to enhance your cake-cutting skills:
Chill the Cake: If you’re working with a particularly delicate or soft cake, consider chilling it in the refrigerator for a short time before cutting. This will make the layers firmer and easier to handle.
Use Dental Floss: For cakes with exceptionally soft or sticky layers, try using dental floss to slice through them. Slide a piece of unscented dental floss underneath the cake layer, cross the ends over the top, and gently pull them in opposite directions to cut through the layer cleanly.
Warm the Knife: For cakes with buttercream or ganache layers, warm the knife blade by dipping it in hot water and wiping it dry before each cut. This helps the knife glide smoothly through the layers without causing them to tear or collapse.
Consider Cake Collars: If you’re aiming for uniform slices and perfect layer visibility, you can use acetate cake collars around the sides of the cake while cutting. The collar acts as a guide to help you achieve even slices and maintains the structural integrity of the cake layers.
Garnish and Serve: Once all the slices are cut and placed on serving plates, consider adding a finishing touch. Top each slice with a dollop of whipped cream, a sprinkle of cocoa powder, or a fresh berry for an elegant presentation. Take a moment to admire your handiwork before serving and savoring each delectable bite.
Cutting a layered cake is both an art and a science. The precision and care you put into this process contribute to the overall enjoyment and aesthetic appeal of the cake. So, take your time, follow these tips, and let your creativity shine as you slice and serve your beautifully layered creation.
Now that you’ve mastered the art of cutting a layered cake, you can confidently showcase your baking skills and share your delicious creations with friends, family, and guests. Remember, the joy of cake is not just in its taste but also in the way it is presented and served. With your newfound knowledge, enjoy the satisfaction of cutting and savoring each slice of your perfectly layered cake. Happy slicing and happy indulging!